A Randomly Selected Newspaper Headline:

The following is a randomly selected newspaper headline from many years ago:

Welcome to my blog. Please feel free to leave a comment. I assure you I always read and appreciate everything you have to say. Unfortunately, thanks to Blogger being, well . . . Blogger, I can not respond to comments nor leave any on your blogs. They simply disappear into the ether. Occasionally I will remember to respond in the next blog post I put up, but usually these good intentions slip my mind. So if you want to ask a question or get a response to any comments you may have please leave an email address or other contact method in your comment and I will get back to you.

I have also added a separate page to the blog for the Tower of Magic with a brief summary of all the rooms of the ToM in the one spot. The link is just below this and above the main body of the blog, or you can just click here.

Wednesday, June 24, 2015

Almost Moving Indoors


Another week and still the outside of Orchid Cottage is not quite finished.  It took an entire day just to sand all the bits of gingerbread trim for the house (and I'm not even using all the bits that come with the house).  This wouldn't be so much of a complaint if the horrid ply wood bits were anywhere near smooth after all that.  Sadly, the ply wood edges are still rough but trying to sand them until they are smooth just makes them disintegrate (and even then they're still not really smooth anyway).


Eventually there is nothing to do but give up, paint the stuff and stick it in place.  The problem with doing this is the rough surface doesn't take the paint well and if you poke the photos to enlarge them you can see dozens of spots (including the wooden roof) where the paint still needs to be touched up in the rough areas.  The good news is that once I manage to jab paint into all these spots and add some extra trim to tidy the edges of the roof, the construction of the outside will be finished.


I used clear plastic to glaze the windows rather than the horrible printed windows that came with the kit.  Most of theses were printed crookedly, or unevenly and in any event simply did not look 'real'.  Once I remember to buy some more outliner, I will add a stained glass look to at least the large octagonal window above the front door.


With all the sanding and painting for Orchid Cottage and resisting the urge to throw the whole thing through the window not much happened in the ToM bathroom this week.  I did pin the fabric for the canopy over the bath into place, but I'm not sure I really like it at all.  I might make another tub without anything overhead and compare the two to see which looks best in the space.  Perhaps a more oval shaped tub would look better in the space too . . . .

Wednesday, June 17, 2015

Walls, Roofs and Tubs


Most of the past few weeks I've been working on the exterior of Orchid Cottage.  The walls are clad in balsa wood weather boards painted in lavender grey and for the roof I used the wooden shingles that came with the kit.


Surpriseingly, the kit came complete with enough shingles not only to cover the roof that came with the kit, but also the side extension and filled in back roof.  Despite this generosity of shingles I can't really recommend them.  The shingles are so thin that every type of glue I tried on them made them curl up.  Double sided tape actually held them down quite well, but I worried how long this hold would last.  Eventually, I used hot glue as recommended by the manufacturer.  This allowed me to fix the shingles in place without them curling up or distorting, but come next summer the hot glue will melt in the heat and the shingles are liable to start falling off.


I've also been continuing to work on the furniture for the ToM's bathroom.  The re-purposed hall stand makes a convincing sink unit while the stove beside it has been repainted in white.


The storage cupboard and dressing table have had gold accents added.


The central bath tub has acquired four posts that will hold up an overhead canopy.  I just need to figure out how the fabric of the canopy will be draped for the best effect.


Finally, I'd like to warn those of you in the market for a hip bath.  I bought this Streets Ahead bath (code D2230) to use upstairs in Orchid Cottage.  In this photo it looks pretty fabulous doesn't it?  But look what happens when 12th scale Harry tries it out:


There is no way Harry will be able to get himself clean in that.  This is sold as a 12th scale item, yet it is too small for a 12th scale doll to ever use.


On the other hand it is a little too large for a 24th scale doll.  All I can think is that it is intended for use by a 12th scale child rather than an adult.  Gee, it'd be nice if the website said that before you bought it.  My advise to anyone else in the market for a tub like this is to avoid the Streets Ahead tubs (assuming they are all the same) and get the measurements of the item before you buy it.


The tub you see in this photo of the nursery in Preston House is at least half as big again as the new one. . . . And it's in a nursery. . . . . So my current plan is to swap the tubs and use the child size one in the nursery and the large one in Orchid Cottage.  This isn't ideal as I didn't want a tub full of used water in Orchid Cottage, plus the colours won't be the best compliments to the rooms they'll be in but to use a little tub in a grown up's house would just look plain stupid.

Wednesday, June 3, 2015

Construction and Colour


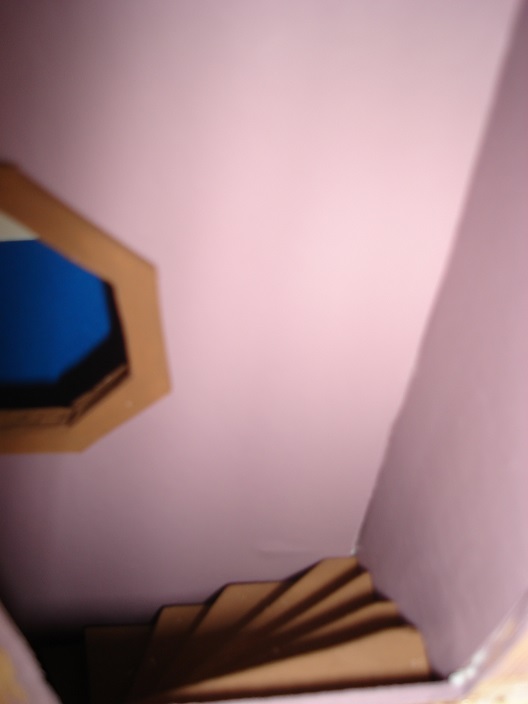
I've continued to work away on the Orchid kit.  The basic house is now assembled and here you can see the small extension that houses the stairs.


 The stairs are made from balsa wood and modelled on the ones that came as part of the Pumpkin Cottage kit from Petite Properties.  I started by cutting two holes in the side wall of the house to create access to the stairs then  cut and built the stairs to join the space between them.  The stairs were then painted and glued into place.


After the stairs were fixed in place I added walls to enclose them and was left with a small but effective extension.


These stairs have worked really well and are a great solution to the common problem of how to fit stairs into a house - just move them outside!


In the house itself I've added a rear wall (remember this kit was supposed to be left open at the back and I've come to the conclusion that is something I hate in a dollshouse).  An extra wall has been added a couple of inches in from the back on the top floor.  This serves a few purposes; first it helps support the roof which due to my modifications has a large patch filling in what should be open space.  Next it creates a back wall against which furniture can sit rather than having to have everything pulled out to fit under the slope of the roof and just looking messy.  It also creates the opportunity to add some recessed shelving - hence the cut out on the left.


Downstairs there is a small jut in the rear right corner which will house the oven.  You'll notice in this photo how the top floor bows upward.  In most photos of this house I've seen on the internet the floor is sagging downward.  My plan is to add beams to the ceiling that will hopefully hold the top floor level and flat (or at least as level and flat as the beams turn out).


This house is the first 1/12th scale, plywood, rear opening American made dollshouse and on the whole I think it will probably be the last.  Firstly, houses left open at the back don't work for me.  Its impossible to layout the furniture nicely and well, it's open to the air so how are you supposed to keep things like dust and cats out?  Secondly I am really disliking the ply wood.  Sure, it's light and the house weights virtually nothing but it warps and it splinters.  I have been trying to get the front of the house to sit nicely against the main structure and then realised why I couldn't, the front was no longer flat but bowed out at one end.  I suspect this is why plywood kits all tend not to have removable/opening walls; if it isn't forcibly glued into place and thus unable to warp, it will warp.  And the way the edges splinter this house needs ten times the sanding of an MDF house which all adds to the time and irritation factor not to mention the chances of getting splinters painfully lodged in your flesh.

If I ever go for another plywood house it will be in a smaller scale (24th or 48th) where the smaller sizes involved will hopefully minimise the warping and bowing of the wood, even if it doesn't solve the other issues.


And moving along now to my other current project, a new room for the Tower of Magic.  This is the ToMs bathroom.  The round structure in the middle will be a feature tub (but is currently doing a great job of storing bits and pieces).  The toilet will be behind the partition in the back left corner for extra privacy (and to hide that the loo is a dodge homemade job).  The remaining furniture is from my stash with the exception of the 'stove' or heater in the back left corner.  This is a small plastic spray bottle with wooden bead feet, jewellery finding finials on top and a cardboard door on front.  At the moment everything is painted a pale seafoam green, but I'm not sure it's the right colour.  The stove definitely will go white.  Um, maybe.  Should the rest of the furniture stay the colour it is, or should it be darker, lighter or a different colour altogether?