
Wednesday, September 16, 2009
Madame Bellerose's - Week Four
Sometimes things go right and all the pieces just fall into place. Then there is the house of Madame Bellerose. It is one of those projects that just refuses to co-operate and come together.
First there is the kitchen, which just looks plain horrible at the moment. It is being brought down by two things, the floor and the doorframes. The floor should look better after furniture and people are added to the room as this will make the floor less visible. The real problem is the doorframes as the only way to take them down will probably involve ripping the wallpaper, which will lead to the need to re-paper the walls and possibly redo the panelling as well. For the time being I am ignoring the kitchen while waiting for a brainwave on how to make it look better to strike.
Then there are the staircases. The pair of curved stairs joining the bottom floor to the middle are acutally progressing quite well. They have been cut out, glued together, filled, roughly sanded and painted with a watery mix of paint and pva glue. They only need the be filled again, re-sanded and then painted/stained and varnished. (Then they need banisters and rails, but that is another problem for another time).
It is the much simpler straight stairs joining the middle to the top floor that is the problem. I used some recycled premade straight stairs to create two sections of stair separated by a landing. Under the lower section of stair I built a bookcase with two gothic arches. As the stairs came with a railing built into the wrong side, I had to remove the exisiting railing and fill the holes. I stained the whole lot and added a 'carpet runner' up the middle of the stairs. Finished, I glued the stair assembly into place. This took all day.
Then I looked at what I had done and realised that for a 12th scale person to walk up the stairs, they would have to bend double at the landing as it was only about 2 1/2" from the ceiling! So after bashing my head against the table a few times I had to carefully pry the staircase out (which I did manage with only minimal damage to the wall and floor papers already installed) and come up with a new staircase design. This new design should work, it may even be an improvement, but I'll judge that after I have made it work!
Once I have the stairs finished, they will need rails/banisters. I have plenty of the mass produced ready made spindles and newel posts in my supply box, but I really want something more 'gothic' to add to the character of the house. I have no ideas at the moment what I will use for the railings but I can guarentee I will want to throw the curved ones through the nearest window at least once before they are done to an acceptible standard! Not only do I need to figure out how to make them curved, I need to make them with the same curve as the stairs.


Friday, September 11, 2009
Headline News!
The following are a list of newspaper headlines, some clearly quite old, that came to me via the friend of a friend's friend's friend. (Or something like that). I have no idea of the actual origin of them, but they are worthy of a giggle!
# Prostitutes appeal to Pope
# Panda mating fails; Vetrinarian takes over
# Include your children when baking cookies
# Something went wrong in jet crash, expert says
# Police begin campaign to run down jay walkers
# Safety experts say school bus passengers should be belted
# Drunk gets nine months in violin case
# Survivor of Siamese twins joins parents
# Iraqi head seeks arms
# British left Waffles on Falkland Isles
# Lung cancer in women mushrooms
# Eye drops off shelf
# Teachers strike idle kids
# Clinton wins on budget, but more lies ahead
# Enraged cow injures farmer with ax
# Plane too close to ground, crash probe told
# Miners refuse to work after death
# Juvenile court to try shooting defendant
# Stolen painting found by tree
# Two sisters reunited after 18 years in checkout counter
# Never withhold Herpes infection from loved one
# War dims hope for peace
# If strike isn't settled quickly, it may last a while
# Cold wave linked to tempuratures
# Deer kill 17,000
# Enfields couple slain; police suspect homicide
# Red tape holds up new bridges
# Typhoon rips through cemetery, hundreds dead
# Man struck by lightning faces battery charge
# New study of obesity looks for larger test group
# Astronaut takes blame for gas in spacecraft
# Kids make nutritious snacks
# Chef throws his heart into helping feed needy
# Arson suspect held in Massachusetts fire
# Ban on soliciting dead in Trotwood
# Local high school drop outs cut in half
# New vaccine may contain rabies
# Hospitals are sued by 7 foot doctors
Madame Bellerose's - Week Three
Week three was largely swallowed by working on the Bakery. The only work to MB's I got done was in the kitchen where I added the panelling and the frames over the scullery doorways.
Unfortunately . . . . . . .
It all looks horrid and will probably be pulled out just as soon as I decide what else to do with it!
The Bakery - Week Three
 After what seems like an endless eternity of stenciling, the brickwork on the inside and outside of the bakery's basement block is finished! That means it's time to say the same thing I always say after using a stencil to create brick or stone work - I am never doing that again! This time I might actually be forced to keep my word on that as neither of the craft shops in town seem to be keeping the ingredients for my 'stone/brick paste' anymore. Something else I'll have to buy online perhaps.
Ater finishing with the stenciling and allowing the last lot of brickwork to dry, it was time to 'wash' the bricks. I do this to all the brick and stone finishes I have created with stencils and the texure paste mix as it has several effects. First, it evens out the colour where I've had to mix another batch of paste and the colour inevitably comes out a little different. Second, and yes I know this is a bit of a contradicition, it creates variations in the colour of the brick/stone by making the wash heavier in some places than others.
The wash itself is made from a little extra of the brick 'paste', extra stone effect paint and acrylic paints all mixed in a pot of water so that the final mix is only fractionally less viscous than plain water. The 'raw' bricks were a little to sickly in colour for my taste so I added plenty of extra red and black paint to the wash I put over them to darken them up - and they ended up pink!
Deciding to settle for pink brick I then highlighted random bricks with chalk paint in shades of brown and applied a couple of coats of sealer and finally, the bricks were finished!
After what seems like an endless eternity of stenciling, the brickwork on the inside and outside of the bakery's basement block is finished! That means it's time to say the same thing I always say after using a stencil to create brick or stone work - I am never doing that again! This time I might actually be forced to keep my word on that as neither of the craft shops in town seem to be keeping the ingredients for my 'stone/brick paste' anymore. Something else I'll have to buy online perhaps.
Ater finishing with the stenciling and allowing the last lot of brickwork to dry, it was time to 'wash' the bricks. I do this to all the brick and stone finishes I have created with stencils and the texure paste mix as it has several effects. First, it evens out the colour where I've had to mix another batch of paste and the colour inevitably comes out a little different. Second, and yes I know this is a bit of a contradicition, it creates variations in the colour of the brick/stone by making the wash heavier in some places than others.
The wash itself is made from a little extra of the brick 'paste', extra stone effect paint and acrylic paints all mixed in a pot of water so that the final mix is only fractionally less viscous than plain water. The 'raw' bricks were a little to sickly in colour for my taste so I added plenty of extra red and black paint to the wash I put over them to darken them up - and they ended up pink!
Deciding to settle for pink brick I then highlighted random bricks with chalk paint in shades of brown and applied a couple of coats of sealer and finally, the bricks were finished!
Thursday, September 3, 2009
On The Up - Stairs for all Occasions
If you're tired of the same old boring staircases that come in miniature scales, try visiting the following links for some inspiration. Included are stairs in just about every style imaginable and even afew that are impossible to imagine!
Stair Parts Carved
Custom Stairs and Trim
Michael Burke Construction
Inlaid Marquetry Stairs
Nine Creative Staircases
Bristol Joinery - Staircase Gallery
Staircase Creative Designs
Wednesday, September 2, 2009
The Bakery - Week Two or Bricked Up
Bricks, bricks and more bricks. The problem with covering a space inside and out in brickwork is that there are soooooo very many bricks to add. I've been using a brick stencil from Bromley Craft Products and my own mix of 'brick paste' to add the effect of bricks to the bakery's basement block. After two weeks I am almost finished adding bricks, just one more panel of the front and the top to go! Even then I'm still not quite done with the bricks as I have to add free formed bricks around the top edge of the arches on the front. I haven't figured out how to make the oven yet, but no doubt this will also need to be bricked!
Madame Bellerose's - Week Two
Now that the exterior of Madame Bellerose's home is finished (at least until I change my mind about it) I have started on the interior decor. Normally I start from the ceiling of a room and work down (ceiling, walls, floor). This means that I don't have to worry about splashing the walls as I paint the ceiling, plus once the ceilings are finished, I generally don't need to turn the whole house upsidedown again. For M.B.'s I decided not to paint the ceilings, but to make a feature of the ceilings with embossed paper with balsa wood panelling. With that in mind I papered the ceilings, then the walls, then added the panelling to the ceilings as the paneling helps to hold both the roof and wall papers in place. The exception to this process is the ground floor where the kitchen has a plain ceiling and the 'hall' is completely covered in the embossed paper without any paneling.
From the top floor down, the rooms have the following colour schemes:
Bedroom: Has an oversided fler-de-lys pattern in lavender on purple. This 'wallpaper' is really a quilting fabric. The floor will be of wood-effect paper.
Lounge/Study: Has dark forest green walls with a pattern of paler green vines. This room is papered with scrapbooking paper.
Seance Room: Has floral patterned walls in burgundy on pink. Another fabric.
Kitchen/Scullery: The scullery at the rear has plain white walls. The kitchen has a white ceiling, blue floral on cream upper walls while the bottom of the walls will have some gothic-influenced panelling. This is the only room with made to purpose mini wallpaper! The floor of both areas is already down, made from pieces of vinyl 'stone look' floor tiles cut into 'slabs', the gaps between slabs has been grouted.
Entrance Hall: The walls are papered with cream scrapbook paper with a pattern of beige motifs. The floor is covered with made to purpose miniature victorian floor tile paper.
Barehaven Miniature Pottery
Argh! I just realised I overlooked adding Barehaven Miniature Pottery to my list of links.
Click Here to see their site!
They make the most amazing, tiny pottery products in 1/12 (or 1") scale. Butter churns, tea pots, cauldrons, vases and more are all hand thrown on a pottery wheel.
Tuesday, September 1, 2009
Spring Down Under
Today is the first official day of spring in Australia (and also the first day it hasn't rained lions and wolves - like cats and dogs only heavier! - in a week, or do I mean a month?) It has been a ridiculously wet winter in Tasmania. Naturally three months ago all the 'experts' were saying to expect a very dry winter!
Australian spring starts on 1st September, summer on 1st December, autumn on 1st March and winter on 1st June. As a British colony we would logically have inherited these dates from the English (only in reverse). So why do the British and American seasons officially change on the solstices and equinoxes? I can't seem to find an answer to this question, but I assume that someone 'up north' decided to change the dates of the seasons sometime after Australia was colonised (the past 200 years) but forgot to tell us. Pushing the official seasons back does make sense as the earth's wobble on it's axis and variations in it's orbit (etc) mean that the seasons have changed over time. Why, the winter solstice was once celebrated as 'Midwinter', but now it is only considered the start of winter rather than the middle.
If anybody knows when and why it was decided that the northern seasons officially start on the solstices and equinoxes or why us Aussies are different, I'd like to know so please leave a comment!
Tuesday, August 25, 2009
Madame Bellerose and a Giant Cat
From now on, my 'Victorian Gothic' house will be known as 'Madame Bellerose's' after the miniature 'owner' of the house. Meanwhile, take a look below at what happened to her house over the weekend. It was invaded by a giant cat called Ginny!


Wednesday, August 19, 2009
Two for One . . .
It was kind of inevitable wasn't it?
After all, I couldn't decide whether to do the Dragon's Maiden or the Magician's Lookout first, so I did both together. So this time 'round when I had trouble choosing between two ideas I suppose I always knew I'd end up giving up on choosing and doing both together.
And so I have.
Form now on I am officially working on both a medieval/tudor bakery and a victorian gothic house. At this point the projects are simple called "The Bakery" and the "Victorian Gothic". Hopefully they will attract more inspired titles as they develop.
As I've mentioned in earlier blog posts, both projects will make use of cheap flat-packed shelf units. The Victorian Gothic will be built into two shelving units, a three shelf and a two shelf. Here's a pic of each unit assembled as per the instructions:

 They will be side by side with doors and stairwells cut in at appropriate places. They create space for five rooms which at the moment will be: a bedroom, a lounge-come-study, an entrance hall with feature staircase, a "seance" room where the house's resident psychic conducts business and a kitchen, perhaps with an additional partition wall to create space for a scullery behind.
The Bakery will start with the basement which will be built into this box:
They will be side by side with doors and stairwells cut in at appropriate places. They create space for five rooms which at the moment will be: a bedroom, a lounge-come-study, an entrance hall with feature staircase, a "seance" room where the house's resident psychic conducts business and a kitchen, perhaps with an additional partition wall to create space for a scullery behind.
The Bakery will start with the basement which will be built into this box:
 Yes, I do know that subterranean bakeries are not exactly common, historically or now, but when did I ever say I was trying for historical accuracy? Besides, having the bakery on a different level to the 'shop' means that I can give each area more space and thus more detail.
As the next photo shows, I have started work on the basement by cutting boards for a 'fake' floor and front facade. The main chamber is the bakery, accessed by a ladder leading to a hatch onto the 'street' level. Of the two smaller chambers at the bottom, one is for storage (of flour sacks etc) while the other is for a sewer.
Yes, I do know that subterranean bakeries are not exactly common, historically or now, but when did I ever say I was trying for historical accuracy? Besides, having the bakery on a different level to the 'shop' means that I can give each area more space and thus more detail.
As the next photo shows, I have started work on the basement by cutting boards for a 'fake' floor and front facade. The main chamber is the bakery, accessed by a ladder leading to a hatch onto the 'street' level. Of the two smaller chambers at the bottom, one is for storage (of flour sacks etc) while the other is for a sewer.
 I think that someone associated with the bakery is engaged in smuggling and uses the access between the storage space and the sewer to come and go unseen. Perhaps the mill where the flour comes from is close to a gem mine and gems are being smuggled into the city in the flour sacks? I haven't quite decided what the story is here, but something nefarious is definitely going on.

 They will be side by side with doors and stairwells cut in at appropriate places. They create space for five rooms which at the moment will be: a bedroom, a lounge-come-study, an entrance hall with feature staircase, a "seance" room where the house's resident psychic conducts business and a kitchen, perhaps with an additional partition wall to create space for a scullery behind.
The Bakery will start with the basement which will be built into this box:
They will be side by side with doors and stairwells cut in at appropriate places. They create space for five rooms which at the moment will be: a bedroom, a lounge-come-study, an entrance hall with feature staircase, a "seance" room where the house's resident psychic conducts business and a kitchen, perhaps with an additional partition wall to create space for a scullery behind.
The Bakery will start with the basement which will be built into this box:
 Yes, I do know that subterranean bakeries are not exactly common, historically or now, but when did I ever say I was trying for historical accuracy? Besides, having the bakery on a different level to the 'shop' means that I can give each area more space and thus more detail.
As the next photo shows, I have started work on the basement by cutting boards for a 'fake' floor and front facade. The main chamber is the bakery, accessed by a ladder leading to a hatch onto the 'street' level. Of the two smaller chambers at the bottom, one is for storage (of flour sacks etc) while the other is for a sewer.
Yes, I do know that subterranean bakeries are not exactly common, historically or now, but when did I ever say I was trying for historical accuracy? Besides, having the bakery on a different level to the 'shop' means that I can give each area more space and thus more detail.
As the next photo shows, I have started work on the basement by cutting boards for a 'fake' floor and front facade. The main chamber is the bakery, accessed by a ladder leading to a hatch onto the 'street' level. Of the two smaller chambers at the bottom, one is for storage (of flour sacks etc) while the other is for a sewer.
 I think that someone associated with the bakery is engaged in smuggling and uses the access between the storage space and the sewer to come and go unseen. Perhaps the mill where the flour comes from is close to a gem mine and gems are being smuggled into the city in the flour sacks? I haven't quite decided what the story is here, but something nefarious is definitely going on.
Friday, August 14, 2009
More Links
Tried to find some nice ribbon lately? Something that could work as a staircarpet or a decoration on a dress. Around my way, you'd better not even try. This is the best online store in Australia selling a decent range of ribbon that I have been able to find: Ribbon Worx
And another aussie miniatures site: Egg Miniatures They are more focused on egg decorating, but do have a small range of dollshouse supplies.
Inspirations and Other Stuff
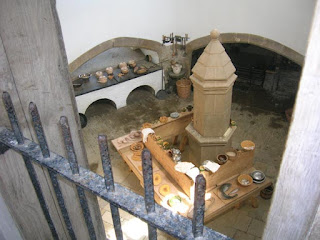
The following are a mixed assortment of images I've collected as inspiration for my tudor and victorian gothic houses.




Friday, August 7, 2009
Gothic or Tudor?
As my current DH projects are nearing completion, it is time to start planning the next project. My long standing list of ideas contains everything from a viking longboat to an art deco room and is constantly being added to. When I start a project, it usually turns out to be something completely different than I originally had in mind, so the original item remains on the list to I can try it again later. The result? I need a bigger notebook for just the undeveloped ideas!
The two forerunners for my next task are a house for a witch in a Victorian Gothic style (or maybe medieval gothic?) and a tudor 'shop'. A few weeks ago I picked up some cheap flat-packed bookcases from a local bargain retailer (yep, Chickenfeed again). One has two shelves (making three rooms) and one is just a single cube, perfect for a roombox.
If I decide to go Tudor, I'll use the single box as the basement which will be a storeroom or workroom for the shop. Ontop of the box I'll build the main house (from scratch - what a scary thought!). The first level will be on stilts and open, this is where the shop/market/stall will be, with perhaps a small 'room'section for an office. Ontop of that will be at least two levels of residence. I'm not sure what type of business this will be, but it will be a successful business as the owners living above are quite affluent people with the best of everything. With this project I can build it room-by-room, starting with the basement and working up, treating each level as it's own roombox.
If I choose gothic, I'll use the larger shelf unit to make a three story house and maybe go back to the shops and pick up a one shelf/two level shelf to put beside the three level shelves to make a five room house. I'm thinking I will put the 'front' door at the side and cover the open front with clear perspex so that the house has a front fascade but is still open for display. (I don't really see the point in taking so much time decorating the insides and then shutting them away behind a wall!) I want to put in some ornate gothic windows and doors and perhaps a round turrent. The inhabitant of the house will be a witch or sorceress. Perhaps she makes money as a psychic and holds séances in her front room.
Both houses can be made as floor standing units, which is a good thing as I am pretty much out of shelf space. Of course, I've thought that for years but keep finding more ways to fit more in!
Interior Design Link
Need help designing or co-ordinating your dollshouse? The following site is designed to help people plan their full size decoration, but the tips and ideas will work just as well in smaller scale.
Link:
Interior Design Tutor
Subscribe to:
Posts (Atom)