A Randomly Selected Newspaper Headline:

The following is a randomly selected newspaper headline from many years ago:

Welcome to my blog. Please feel free to leave a comment. I assure you I always read and appreciate everything you have to say. Unfortunately, thanks to Blogger being, well . . . Blogger, I can not respond to comments nor leave any on your blogs. They simply disappear into the ether. Occasionally I will remember to respond in the next blog post I put up, but usually these good intentions slip my mind. So if you want to ask a question or get a response to any comments you may have please leave an email address or other contact method in your comment and I will get back to you.

I have also added a separate page to the blog for the Tower of Magic with a brief summary of all the rooms of the ToM in the one spot. The link is just below this and above the main body of the blog, or you can just click here.
Showing posts with label welcome. Show all posts

Tuesday, June 21, 2011

All Booked Up . . .

Being a report on Castle Starcaster Week 20 and Witch Shop Week 9


Wow!  99 Followers!  How amazing!  Welcome to Oberon's Wood who is a pagan artist and miniaturist.  Her miniatures shop can be found at Sorceress Hollow.


I started out the week making books, lots and lots of books.  Some are from a kit and consist of a book sized block of wood around which a piece of leather is wrapped like a book cover.  Some are made from old phone books and covered with printed paper covers.  (I plan to do a tutorial on this method of book making soon, so be sure and check back later in the week!)  Everytime I finished a book I tossed it onto the floor of the Castle's library.  Eventually, the entire floor of the library was knee deep in books.  I knew I still didn't have enough books, but was so tired of making them that I decided to stop and put what I had on the shelves to get an idea of how many more I needed.  To my surprise I had enough books to fill all the shelves in the Library.  It's remarkable how much better the room looks with books on the shelves (especially compared to when they were on the floor!)  The bad news is that I have no books left over for the witch shop and thus still have about as many books yet to make as I have already made.


Before I could fill the shelves, I had to remove the dragons who had decided they were a safe place to perch while work was underway in the castle.  Remember last week I worked on the Dragon Study room?  Well, silly me, those dragons in the library were supposed to be in that room, but I had forgotten all about them!  So when they came out of the library, they went into the Dragon room and set about causing mischief in there.  One of the additions the room still needs is a nest for the little dragons to rest in when their mischief is done.  There are now seven of Nicky Cooper's little dragons in the room, can you spot them all?


Speaking of Nicky, I have another of her lovely creatures to add to the Witch Shop too.  He's the Monster-Under-the-Bed and came in a little cage looking very droopy and miserable.  I bought him thinking to make him an item for sale in the shop, but have since very carefully pried him out of his cage and am now thinking he will be in one of two possible places.  First is hiding under Hetty's bed which will surely make him feel more at home.  The second possiblity is to add a collar and leash and have him in the reading room under one of the chairs as the pet of one of the gathered witches waiting forlornly for all the cackling to subside so he can get a bit of rest.


As you can see in the photo, I have finished some more furniture for the shop.  The glossy white cabinet that's been seen in earlier photos of the shop has been repainted in black paint crackled to reveal the metallic blue beneath.  I "borrowed" a counter from a much earlier shop and found this a better fit than the counter I had been planning to use in the shop, so I swapped counters and repainted the smaller one to match the rest of the shop furniture.  Going back to the dragons of Nicky Cooper, some of them came in clear plastic cases with padded bases.  These cases were turned into display tables by adding a strip of balsa wood around the base and glueing some Georgian style pre bought legs underneath.  A little bit of faux leadlighting outline tape around the edges of the clear tops finished them off and now all they need is something to be displayed in them.


Flipping back over to the Castle, I did a little work in the long neglected dining room.  There needed to be a thick fuzzy rug under the table to conceal the fact that the floor is sagging in the middle.  The fabric I used for the rug is really weird stuff called feather fabric.  It's not as dense as a fur fabric and has a long but sparse pile.  The vivid white of the fabric didn't look right against the black floor, so I soaked it in some watered down metallic platinum coloured paint which gave it more of a shipskin or fleece look.  The two chairs in the room were recovered with red velveteen and a bench seat was made for the front side of the table.  A table runner was made from green velveteen and more of the metallic ribbon used around the tops of the walls.  I bought this table specifically to go in this room, but right from the first time I put the table into the room I worried that the table was too big.  I still think maybe the table should get the boot and this room should become some sort of sitting room, or at least a dining room with a smaller table.  But then what do I do with the very gorgeous table?


While I'm sharing problems, I still don't know what to do with the centre room!  It's the room in the exact centre of the castle being on the second of three floors and the middle of the three rooms accross.  It has to be a public space (not a bathroom etc) as it opens into the library, has a fake door accessing the supposed back of the castle and has stairs up to the next level.  The dining table is not a good fit for this room either, besides a dining room upstairs between a library and a bedroom doesn't seem right.  So what can it be?  I'm seriously lacking in ideas for this one and any suggestions would be welcome.  And no, I don't believe in subtlety when dropping hints.

Tuesday, June 14, 2011

Of Witches and Dragons

Being a report on Castle Starcaster Week 19 and Witch Shop Week Eight.

Firstly this week I have two more new followers to welcome.  I'm up to 97 followers now and isn't that amazing.  The two newcomers are Caraloo of Lilac Hill News and Rosamargarita of Chiquicosas.  Thanks for following.  In other news, Linda of Linda's Miniature Musings is currently offering a giveaway on her blog.  For a chance to win a 1/144 scale house kit, please visit her blog here.

Those of you who have been following for a while will know that because I added extra doors in the Castle, I was short of door handles.  So a couple of weeks ago I ordered some more handles to match the others.  While browsing the store to see if there was anything else I needed that I could put on the same order I found a 1/12 scale bicycle.  By no means was this something I needed, but the moment I saw it I could see it being ridden by a slightly eccentric witch who was having difficulties with her broomstick and was forced to resort to an alternate means of transportation.  From that moment, I had to have the bike and when it arrived in the mail early in the week I couldn't wait to get started on making the witch to ride it.  And here she is:


Her name is Minerva (Minnie for short).  I can't tell you how proud I am of Minnie as every part of her was made from scratch.  A week ago she was only a lump of polymer clay, some wire and foam.   Before you start thinking I'm really something and managed to sculpt her by hand I'd better admit that I used push moulds to create her face and hands.  I've had the push mould of 1/12 scale faces, hands and feet for years, but only used it once before.  I was disapointed that all the faces were the faces of ugly old hags and because old hags are only a small portion of the population that discovery really sapped my enthusiasm for the push mould and because I can't make faces without help (at least not ones even uglier than those in the moulds) there died my ambitions of making my own dolls.  Minerva, however, would have to be a hand made doll if she was going to fill the vision in my head and fortunately she was supposed to look like an old hag so the moulds for once proved perfect.


I mixed even amounts of Super Sculpy and translucent Sculpy to create her skin colour and pushed a ball of this into the mould.  A tip to remember is to lightly spray the mould with water to prevent the clay from sticking.   I then carefully curled the excess clay back to create a head shape behind the face.  I adapted the face by enlarging the nose by inserting a ball tipped stylus up the nostrils and carefully swirling it about and pushing forward.  The mouth was opened by carefully cutting between the lips with a thin blade and the stylus was again used to work it open and create a cavity for the mouth.  Another minus with the moulds is that none of the faces have ears so I attached some cresent shaped bits of clay to the sides of her head.  They look nothing like ears, but they are covered by her hair and gave me something to attach her earings too later on.  Minnie's hands also came out of the mould.  Her fingers were carefully cut apart and curled about the bike's handlebars so she would be able to grip them.  Minnie's feet and lower legs were made without the aid of a mould which is why one boot is larger than the other.


Once baked and cooled, Minnie's face was painted with chalk pastels for her cheeks, lips and ears and normal acrylics for her eyes and eyebrows.  Her shoes and legs were also painted with acrylics, black for the boots and black and white stripes for the stockings.  Her "bits" were all joined using a heavy gauge wire which was then wrapped in thin foam to create a slightly chubby body.  Her hair is merino wool which varigates from white to orange and is parted in the middle.


Minnie's clothes were all hand made too.  She wears red bloomers, a red petticoat (not visible in the photos), a black dress with a green sash at the waist and a matching green hat.  Her outfit is completed with sun and star earings that match the cresent moon in her hat.  I dabbed super glue onto the bike's axles and pedals to stop them moving and then glued Minnie onto the bike.  Her broken broom is tied onto the back so she can take it into the shop to get it repaired and she has a couple of books in the front basket as she's late for the book meeting in the Reading room of the shop!


Alongisde Minerva, I made two more dolls in the same way.  They are Hector and Agatha.  Agatha is a kindly old witch whose come to attend the book club meeting.  Hector is the renowned author of many books on magic and witchcraft and has been invited to attend the book meeting as a guest speaker.


The past few weeks, the Witch Shop has been getting much more attention than the Castle, so once I had finished with Minerva, Hector and Agatha I decided to concentrate all my attention on the castle for a few days.  I decided to accessorise the room on the top floor of the castle which is a room for the studying of dragons. 


To get a better view of the dragons flying over the distant mountains there is a telescope on a stand positioned by the windows.  The telescope came from ebay while the stand is four fan blades painted brassie gold and glued around a block of balsa wood painted black.  In the back left corner of the room an articulated dragon skeleton is displayed.  This is one idea that didn't work so well.  The basic skeleton is that of a duck billed dinosaur with polymer clay wing bones glued on it.  Sadly, it just looks like a dinosaur with weirdly positioned antlers on it's back.  I think this is going to have to be replaced by something else.


On the right side wall is a tall cupboard made from a kit.  It holds a range of items from books and scrolls to dragon scales and potion bottles. 


A lovely open book and dragon embryo in jar bought from ebay seller whydgc is the focal point on the central table made by Angela Downton.  The table was further accessorised with some books made from cut up old phone directories and a jar of "dragon scales" (i.e. cut up Easter egg wrappers).  On the left wall by the door to the roof garden is a rack from which two cloaks hang so folks can go out into the garden even in bad weather.  This room still needs a few touches and accessories, but is getting fairly close to being the first castle room to be finished.


Despite the fact I said no more Witch Shop this week, I did make far too many potion bottles for the Dragon Room, so I positioned some of the leftovers on the shop shelves.  I filled up half the shelves and still have potion bottles left over!

Wednesday, June 8, 2011

Witch Shop - Week Seven

Yikes!  Another new follower to welcome!  Hello and welcome to Agata of http://idolcidiagata.blogspot.com/  When I first took a look at the photos on her blog (its written in Italian, so reading it was out without waiting to get it translated) I thought "Wow, that is some impressive miniature food!" but when I looked at the photos more closely I realised Agata makes 1:1 scale food.  Real food that really looks incredibly good.


At the start of the week I decided that yes, there was room for fireplaces in the two upstairs rooms of the shop.  One of the things that had made me heasitant to add a fireplace in the reading room was the opening roof above the fireplace.  How could I make a chimney that looked good both when the roof was closed and open?  I solved the problem by creating the impression of a chimney without bothering with an actual chimney.  This was done with a sheet of paperclay the width of the fireplace unit and the height of the wall, angled at the top to match the angle of the roof.  I used my herringbone brick impress mould to create the impression of bricks in the clay and when dry, painted them to look like bricks and glued the sheet to the wall.  The fireplace itself was made from corrugated cardboard.  It has a high hearth and two openings in the front, one for a store of firewood and one for the fire itself.  The design was based on my hazy recollection of a Tudor fireplace I think I saw in a dollshouse magazine once.  It is finished off with more clay, another impress mould and brick coloured paints.  Because the fireplace juts out from the wall but the "chimney" doesn't, there is a nice wide ledge ontop of the fireplace to display some heatproof witchy items.   The afternoon tea spread for the withes reading group will have to go on the little table to the side of the fireplace or on the coffee table in the middle of the group of chairs.  I do have an old tea trolley in my box of miscellaneous furniture, but there is no where for it to go.  What ever gave me the idea the rooms in this kit were big and spacious?  I could do with them being at least half as big again!


In the Bedsit I made a simple rectangular fireplace that covers about two thirds of the back wall of the room.  It was made out of thick corrugated cardboard which was then coated with some polyfilla and painted white to resemble rough plasterwork.  The hearth was covered in a thin layer of paperclay on which I used my herringbone brick impress mould.  The back of the fireplace is prebought MDF brickboard. Both this and hearth were painted first in mortar grey, then dry brushed successive layers of brick tones of reds and browns before the lot was covered in "soot" (black paint).  A thin strip of balsa wood accross the top of the opening creates the look of a lintel while some bits of black wire bent into hooks and stuck up the chimney make pot hangers (or do I mean cauldron hangers?).  Now Hetty has somewhere to cook her meals and can keep warm in winter.  There's just one problem in this room though, I can't fit a table in it.  So Hetty can cook over a fire, but doesn't have anywhere to prepare the meal before it goes in the pot, nor anywhere to sit down and eat.  The only solution I hve for this is to make a folding table attached to the wall that takes up no space when not in use, the only problem no one will be able to get in or out of the room when it is in use.  It may not matter anyway as I have just bought a shiny brass bed for the room that I hope will fit.  There is a good chance that when it arrives I will have to completely rethink the room to fit it in.  So I won't be making any changes in this room for a couple of weeks until the bed arrives and I have the chance to see how it looks.

Wednesday, April 27, 2011

Castle Starcaster - Week Twelve

Welcome to the newest follower, Vanessa, who doesn't appear to have a blog of her own.


 As you may have already guessed, most of my attention this week was on the new Witch Shop, but I still managed to do a few small things to the castle, mainly in the bedroom where I finally finished the walls.  This was done with balsa wood sheets about 1.5mm thick.  I used a round tipped stylus to score lines into the wood to create the effect of vertical planks or "shaker" style panelling.  This was then given a wash of white paint, allowing the wood grain to show through in the hope it would look like limewashed wood.  Sadly, in photos this looks pretty ordinary.  You can barely see the panelling and the paint job just looks shoddy.  It does look a great deal better with the naked eye, although I may add a heavier coat of paint.  The furniture in the room is not necessarily the furniture that will be in there permanently, but it does give an idea of what the layout of the finished room will be.

Even though this is meant to be a post about the castle, here a a few shots of the W. Shop as it looks now: 


Believe me, figuring out which bit of wooden trim goes where is an absolute bugger.

Thursday, March 10, 2011

Welcome New Follower and Plans

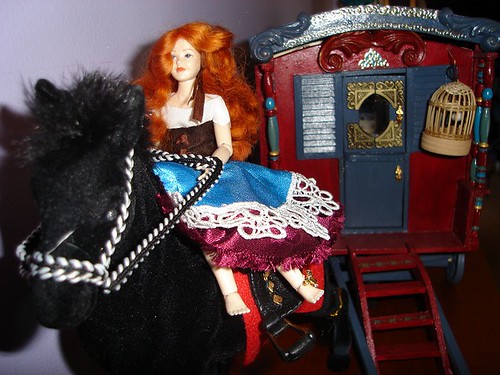
The Waggon by Alennka
The Waggon a photo by Alennka on Flickr.

Wow! I'm now up to 84 Followers thanks to Ascensión. Her blog can be found here: http://ascension-misminiaturas.blogspot.com/ The most current post on her blog shows some fabulous witches vanity items (purfume bottles etc) and if you scroll further down you'll find some truely amazing cakes and teapots. Welcome to my blog Ascensión and thanks for following.

And speaking of Witchy items . . . .

I've decided that my Stratford Bakery kit will become a witch shop. Those of you who haunt the DHE forums will be familiar with Dolly Donut's (Sal's) "Salestras" shop. Those of you who aren't DHE forum regulars, you can see the shop here: http://www.dollshouseforum.com/forum/home-sweet-home-gallery/6954-salestras.html (photos of the finished item are on page 27) Now who could help but be inspired by that? Despite the fact I would love to make exact copies of everything Dolly Donut has done, I'm going to try very hard not to copy anything except the "feel" of the finished item. For one thing any copy I tried would just look second rate in comparision. That said, I may still need to ask permission to borrow some of her ideas depending on how the rest of the planning process goes.

I'm going to add an internal stair case to create a store over two levels. Downstairs wil be shelves and displays of potions, broomsticks and other various witchy necessities. In the room directly above a book section with a large fireplace and seating for customers to get comfortable while aquainting themselves with the stock. I expect there is also a regular meeting of a book group or some such up there after hours as well. The final room upstairs will either be a bed-sit for the owner to live in or maybe an office. By adding a solid back wall under the overhanging room and a fence down the side I hope to create a small garden area where some of the herbs used in potions sold in the store can be grown.

Next weekend is the annual Doll, Bear and Miniature fair at the local casino. I'm hoping to find some bits and pieces there to start the shop and don't want to make my plans too firm until I know what I might find. I would like to know what I'm going to do with the Retreat by then as well so I know what I need to keep an eye out for for it, but at the moment I'm still stuck on that one.

Thursday, March 3, 2011

Proper Week Four and other business

Yesterday's post was a bit of a waste of time, but the way the week was going I thought I'd better throw something up before it got to be next week. Um . . . but I just looked at the blog and discovered the post I did yesterday doesn't exist. Also all the breaks between paragraphs on this post seem to have vanished. It's just been one of those weeks where there's been lots to do and if anything could go wrong with it . . . well, I'm sure you're all familiar with the saying. I hope to have a little time now to do a proper post about the weeks' (lack) of progress. Firstly, a warm welcome to the newest follower of the blog, Caseymini of http://caseymini.blogspot.com/ Many of you are already followers of Casey's blog and are familiar with the antics of Tessie. Casey, with Tessie's help, is a dedicated daily blogger whose posts are always enjoyable to read. Work on the Castle in week four has been slow. It has consisted of more painting. Since week three, a wash of a mid-brown-grey has been appiled over all the walls and then largely sponged off again. This added to the variations in the stone colour but mostly covered the pale grout colour to give it a more timeworn, dirtied up up. This was followed by drybrushing a couple of different light greys over the stones which helped to highlight the uneven surface and surprisingly added to the timeworn look of the walls. As they are now, the walls are darker overall than I initially had in mind, but I think they are going to do as they are. Next up I need to paint the windows, crenellations and side towers. Question is how? What colour and effect. I did paint the side towers in the same colours as the main walls as I did the walls, but sponged instead of drybrushed the colours on the smooth surface. I doesn't really look right, especially when in position against the 'real' stone. And should the windows and crenellations be a lighter or a darker tone, smooth, sponged or something else. Part of the reason why not much has happened to the castle lately is that I'm at a point where I can't decide how to procceed for the best.
Which room will it all end up in?
Continuing the indesicion theme, I've changed my mind yet again on the internal layout. I've come to the conclusion that the various doorways in the librabry make the layout too awkward, so the library is moving accross one room to the room above the kitchen in the East Wing Extension (the right side of the castle). The room that was going to be above the kitchen (a second bedroom) can't go in the middle where the library was as that room has a doorway leading to another bedroom, a fake door at the back and stairs up to the next level. Not exactly the spot for a nice quiet bedroom is it? So what is the room in the heart of the castle going to be? At the moment I'm open to all sugestions. I also can't decide how to decorate the rooms I do know what to put in. Yes, this castle is going to drive me absolutely batty before I finish it.
To try and avoid a complete mental meltdown, I've been ignoring the castle and thinking about my other two kits, the Retreat and Stratford Bakery, instead. Somehow this hasn't helped. The Stratford Bakery has an obvious layout of ground floor shop, top floor living/kitchen room and bedroom. But what sort of shop? An apothecary? A cafe with outdoor dining under the overhaning room? Something fantasy like a wizard supply store, a dragon pet shop or a dress shop for fashionable sorceresses? A jewellery store? A post office? Perhaps if I buy another half dozen or so kits, I can do one of everything? The same can be said of the Retreat, too many ideas, but nothing quite right for the kit. I think it's time to find a brick wall and bang my head against it until all the ideas start falling out, stopping when there is only one idea for each kit left in there. One decision I have made. Cyndy won my giveaway at the start of February, but has yet to get in contact with me. I'll give her until the 20th March to do so. If I still haven't heard from her then, I'll hold the giveaway again with a draw in early April as the winner can receive their prize in time for Easter (hopefully). So hurry up and drop me a line Cyndy, you only have seventeen more days!

Tuesday, February 22, 2011

Welcome New Followers

A Warm welcome to the two newest followers of the blog, Sharon Larkin and Angeles. I can't find a blog for Sharon, but you will find Angeles' here : http://elrincondebaldu.blogspot.com/. Google translate has decided to act up on me so I can't say much about her blog, but I love those bottles!
Remember a few weeks ago I tried to show you images of some of the ideas I had for Starcaster's layout, but couldn't make them upload to blogger properly? Well, for some reason they are working just fine now. The images are a little outdated now given much of the changing of mind that has been going on, but in case anyone is interested, here they are.


Monday, January 31, 2011

Dancing Dragon Inn - Week 21

A few finishing touches were added to the Inn this week. In the "low" bedroom a tapestry was added on the left hand wall, a faux hide mat and a bolster cushion were added to the top of the blanket box, thus elimintating the naked look of this wall.
On the top floor, I added what must be the ultimate cheat in faux windows - closed curtains. I had some extra pleated fabric left from the dividing curtains in the room and glued then to the back wall to look like curtains drawn over a window. This helped correct the naked look of the back wall, but I think it still needs something more back there before it really looks finished. Also, welcome to follower number 75, Fabiola. You can find her blog here: http://fabiolamiominimondo.blogspot.com/

Tuesday, January 25, 2011

Dancing Dragon Inn - Week 20

I have two things to say before starting this week's post.  Firstly, a warm welcome to the newest followers, Kelly and Stitcher.  I can't find a blog link for either of you, but if you have one and would like it added here, just let me know.  Secondly, don't forget there is only one week to go in my Giveaway.  Click on the picture to the right to find out how to enter.

At first I thought I'd dressed enough dolls for a few weeks. Then I reconsidered and decided to go ahead and dress the seven remaining dolls the Inn needed. Like the previous dolls, this batch was supposed to have a Tudor look to them. Mostly they don't. Again something went wrong and the men look more like they should be of a later period. Oh well, at least they look at home in the Inn.

With everybody dressed, I played around positioning and re-positioning them in the Inn until I was happy where everyone was and then played around with various accessories for the people to use. In the tavern I arranged the foodstuffs I made previously and Tacky Waxed them to the tables when I was happy. The beer mugs were all filled with foaming ale (i.e. scenic water pumped full of bubbles) and some eating utencils were pulled out of storage to finish the tables off. much the same treatment was given to the table in the "low" bedroom on the next floor except this table was much more messy, holding not only good and beer but also maps and papers.

Down on ground level I finally made a market stall out of balsa wood scraps and loaded it with a variety of goods including apples (or perhaps they're tomatoes, it's hard to tell as I made them from polymer clay sometime previously), candles, flowers and bananas. Yep, bananas. Not very tudory I know but I made them ages ago and never found a good place to use them and I had an empty spot at the end of the stall . . . . and after all it is a fantasy inn. Basically anything hanging about in my box of miscellanious accessories ended up on the stall.

One or two other small tasks this week include adding handles to the doors. These were made when I had the polymer clay out last week and this week I finally got around to glueing them onto the doors. Also going back to last week are the signs for the Inn. I'm pretty sure I forgot to mention these last time. They are very simple white cardboard rectangles surrounded by a basic balsa wood frame and decorated with a dragon made from faux leadlight paint. The dragon is the same as the one on the front window but in different sizes. There is no writing on the signs because in a society where most people can't read and write a written sign isn't much use.

The Inn is almost finished now. There are a few little things to tend to yet. The market seller at the very least needs a purse to keep her money in. The others may or may not end up with them. The chest in the low bedroom needs some "junk" spread out on top of it, or I might replace it with a different piece of furniture. That's something that needs thinking about. The back wall of the top floor rooms needs something too, tapestries? some exposed brickwork? more beams? They need something else anyway. 

If you have any suggestions or can see anything about the Inn you think is still in need of attention, please feel free to let me know.

I got an email this morning to let me know that my Cumberland Castle kit has been posted! I should be seeing it early next week. As the Inn has been nearing completion I've spent some time flicking through old dollshouse magazines looking to ideas to use in the castle and the other two kits I already have. I found a review of the Cumberland Castle kit from when it was first released in one of them. At the top of the page I'd made some notes and apparently calculated that the kit would cost me $871.00, plus postage from England which would have been about as much again. Now five years later I've finally bought one and thanks to changes in the exchange rate and to Fairy Meadow Miniatures shipping them into Australia it cost me $635 including postage. I probably would have bought the kit from FMM whatever they charged for it, but knowing I would have paid more in times past makes parting with that much money a little easier. Now all I need is FMM to get a Market Cross kit and I'll have all the Dollshouse Emporium kits on my all time most wanted list. At least all the kits DHE still make, they always seem to discontinue the best ones!
 

Tuesday, January 18, 2011

Dancing Dragon Inn - Week 19

  
Firstly, I'd like to welcome the four newest followers to the blog. They are Drora Hed and Eli en Karina, neither of whom appear to have blogs of their own and Susi of Mini Eden and Glenda of Peppercorn Miniatures. Thank you all for choosing to follow my blog and extra thanks to Glenda for her excellent instructions in last April's Dolls House and Miniature Scene, they came in very handy!

After making a start on populating the Inn last week I made a big push this week to get as many people as I could finished. I now have thirteen people dressed, wigged and more or less finished. Some of the dolls vaguely have a tudor look about their clothes, but "vaguely" is as close as they come to any type of authenticity, it is after all a fantasy Inn. In the building and decoration of the Inn, the fantasy aspect wasn't very strong, I was planning to step it up with the people and accessories. So far, this plan has had only minimal success as most of the people are clothed very mundanely. The exceptions are the wizard and his wife for the tavern and the oriental traveller for . . . somewhere in the Inn. The oriental fellow is very striking in vivid red and brocade and is definately not a lowly peasant. Perhaps he should be staying in the high, ie most lavishly expensive, bedroom? As for the wizard and witch, they are very pink-and-purple and decidely not quite right. They either need stripping and re-dressing or perhaps just sitting in the back corner of the tavern where they won't be so noticable. There are still more people needed for the Inn - about eight more. The extra dolls I need arrived in the mail this morning, so I can make a start on the remaining dolls anytime, though after one mamoth sewing effort I may wait until next week to start on them.

Being rather tired of working with fabrics, I sepnt Sunday afternoon working with something completely different - polymer clay. I made some basic door handles, a half dozen ale mugs, some stew, a mass of small pies, one large pie, pieces of bread and a loaf of bread, some jugs and a jug and basin for the washstand in the top floor bedroom. Needless to say, now I'm a bit fed up of clay too. I was going to make some fish for the stream too, but discovered fish are harder to make than you'd expect. I guess my fishing urchin is going to have to go hungry because there are still no fish for the stream. That's okay, I haven't made him a fishing line yet anyway.

The list of major tasks still needing completion is shrinking. It's down to fitting out the downstairs shop, making a stall for the market space and dressing about eight more people. The rest of the "to do" list is small fiddly bits and pieces like making fish and a fishing pole, trying the curtain over the tavern window back, making beer/ale, etc. Hey, maybe I can be finished by the end of January after all?
 

And don't forget to enter my giveaway - Entries close on 31st January.

Friday, January 7, 2011

Welcome Two New Followers


Why Hoard Gold . . . ?
Originally uploaded by Alennka
Greetings to my two newest followers kitty_x_2 and Dark Squirel Victoria.

Kitty doesn't appear to have a blog, but if you do just let me know and I'll add the link here.

Dark Squirel Victoria has her own blog here : http://darksquirrelminiatures.blogspot.com/ and an etsy and an artfire store. She creates some unique miniatures in what I think of as "gothic fantasy" style.

Tuesday, October 5, 2010

Week Four - Drawing Room & D.D. Inn

Yikes!! Even more new followers! At this rate I'm going to need to start giving serious thought to what to do as a 100 follower giveaway . . . . And that is something I never thought I'd have to say! Welcome to the newest followers: Clara of lavidaen miniatura , Marie ofle petit monde merveilleux and cathy_b_1 who doesn't appear to have a blog.

The Piano "Before"
In the Regency Drawing Room I've been arranging and re-arranging the furniture for weeks and reached the conclusion that the Spinet piano was just too big for the space. Having bought it espeically for the room, I didn't want to not use it and add it to the ever growing box of furniture bought but for one reason or another not used. Thus with a great deal of trepidation I began to cut it down to a more suitable size. This involved removing the legs and cutting along the back and side of the piano to reduce both it's width and depth. I was very nervous about doing this as I can't cut straight and was really worried about ruining the piano all together. I credit luck more than skill that the new back and side edges are reasonably straight. After the legs were reattached, the piano was painted gold and decorated with some flower decals. It is now a much better size for the room . . . just as long as you don't look at the back which is just a little rough.

The Piano "after"
Another furniture problem I had with the room was the chaise. The one I was going to place in the room had a partial back on one of the long sides. This meant to look right from the viewer's perspective the chaise had to be in the room with the 'back' at the far side. Yet from the point of view of the person in the room, it should be the other way around. Emboldened by my success with the piano I decided to solve the problem by removing the back piece entirely. This too was painted to match the piano and reupholstered in purple velveteen. I also started painting the cabinet I put together some weeks back out of balsa wood and some ready made legs. The plan is to laquer it and turn it into an oriental style cabinet to add to the chinoserie feel of the room. Now I've seen it in the room in black, it looks too dark for the space. Even when it's been made shiny and had lots of gold added to it, I think it will still look wrong. So, do I try and paint it a different colour? But which colour? I've seen this style of cabinet in black or red, but neither is going to work in the room. I'm not sure it would look right painted say, plum pink to match the fireplace. So maybe I should leave the cabinet out of the room and put the chaise against the wall (in which case it could have kept it's back). I need to give this some more thought.


The few other touches added to the room include some braid around the ceiling to act as a cornice or coving (depending on what part of the world you're in), more braid for the skirting board and a hearth and a back for the fireplace made from air dry clay and the same impress mould I used on the Dancing Dragon's brickwork. Now technically, the fireplace should be deeper than just the surround, but to do that now would require cutting a hole in the back of the box and having the fire place permanently jutting out the back. I decided that the better solution was to place a firescreen infront of the fireplace and hope no one notices that it isn't as deep as it should be.

Not too much happened to the Dancing Dragon this week. I've added a railing along the stairs up to the next level. This is made from staircase spindles carefully split at the top so a split ring could be inserted. Through the rings a length of string was threaded to create a handrail. I've also built the bridge over the stream at the front. This is all balsa wood and consists of two curved supports over which planks have been laid. The posts along the front edge will eventually be joined by a handrail of some sort. Finally, I've started adding some plants to the 'wilderness' section around the stream. Dexter the Digging Dog, who I mentioned in the last post, arrived in the mail just this morning (and he is as gorgeous in real life as he was as a photo on the internet!) and as soon as I get into town to buy some 'dirt' I'll place him by the stream with a pile of dirt he's dug up. Eventually, I'll also add his young owner fishing off the bridge.

The good news is that I think I've finished all the jobs that require access from above, so I'm ready to start work on the next level. The problem is that I need to make a final decision on the layout of the second floor. Most of it will be occupied by the tavern of the Dancing Dragon. What I haven't decided is whether the rest of the floor should be the kitchen, a private 'back room' or just an extension of the tavern.